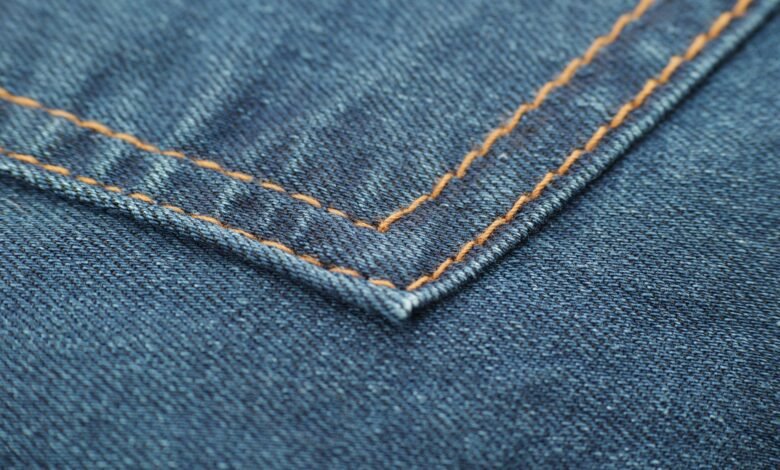
A straight hem in the store can still curl after a few wears. You can learn how to tell if a hem is well made without looking inside from outside clues alone. Blind versus topstitched finish, a faint ridge for depth, and side-seam tail map to ASTM D6193 classes and AATCC TM88B grades.
Because hem classes come from ASTM D6193 and smoothness from AATCC TM88B, this is official taxonomy, not preference. A deeper fold with balanced tension helps a hem hang and resist curling, while a single-thread chain stitch can unravel if one loop breaks and a lockstitch holds. Keep reading for a quick-scan card linking outside clues to inside construction and longevity.
How hem construction is classified and why outside clues matter
Hem construction is coded by the ASTM D6193 standard, which groups finished edge hems into classes. Class EFa covers a topstitched hem where the edge is turned once or twice and stitched through, so the line shows on the outside. Class EFb covers a blind hem where the fabric forms an S-fold with the raw edge turned under, and a tiny catch barely penetrates the face.
Class EFc covers a faced hem where a separate strip finishes the edge, often used on curved skirts or when bulk must be reduced. That classification matters because what you see outside predicts the hidden layers. A topstitched EFa shows a straight row of stitches and a crisp double-fold edge, with slight stiffness where two layers add up.
A blind hem EFb shows almost no stitch, only faint dimples where the needle caught the face, and a soft shadow line above the edge where the S-fold sits. Examining the fold line reveals how inside bulk is distributed, which signals how flat the edge will stay. That outside ridge and stiffness are well made hem signs outside quality check you can read without flipping.
The EF naming comes from historical federal specifications for stitching classes, documented in early government sewing standards that defined S-fold formation for finished edge hemming. The stitching class EF archive shows how EFa and EFb were first separated by whether the stitch penetrates the face. That history explains why outside visibility still tells you the inside structure for women’s pants and skirts in mid to investment tiers.
Stage boxes showing process in 3 stages from start to finish
How to read hem depth and weight without flipping the garment
Blind hem depth shows differently than a topstitched hem, so the pinch test starts with what the class predicts. Place the hem edge between thumb and forefinger and slide upward until you feel a second line of bulk. That line marks the inner fold.
If it feels like a narrow tape about a quarter inch, the allowance is shallow. If it feels like a wider band of one to two inches, the allowance is deeper. Examining the hem edge by pinching reveals how much fabric is hidden inside, which signals how much weight is available to hold the edge down.
Deeper allowance adds weight at the edge and gives fabric memory more material to hold shape. That weight helps the garment hang straight and resist the upward curl that appears when tension pulls a narrow edge. Very narrow hems on straight trousers lack that stabilizing weight, so the edge can lift at the side seam after sitting or walking.
On skirts and dresses, a wider hem also smooths flare and keeps the hemline from rippling. The NMSU extension guide notes that skirts, dresses, and coats generally have wider hems of two to three inches, while jackets, pants, and blouses often use one to two inches. It also notes that straighter edges have deeper hems than flared or circular edges, which matches how hem depth quality indicator pants skirt changes with cut.
A faint horizontal ridge about two to three centimeters above the hem on the outside often signals a deeper allowance underneath. The seam allowance reference shows that allowance ranges from a quarter inch in curved areas to an inch or more where extra fabric helps final fit. That ridge is not a flaw when it is even — it is a sign of hidden depth.
At the hem edge, look for a soft shadow line that runs parallel to the bottom, then pinch and slide to feel the inner fold. Try this before you buy: estimate whether the allowance feels like a narrow quarter inch tape or a wider one to two inch band, then check if the hem hangs flat or lifts at the side seam. If the edge shows wear after a few uses, that typically signals insufficient stability to resist movement.
Interactive calculator: adjust settings to estimate outcome
What stitch visibility and puckering reveal about tension and finish
Depth without balanced tension still puckers, so the next clue is how smooth the hemline looks from the outside. The AATCC TM88B standard defines a method to grade seam smoothness after home laundering, using photographic scales from Grade 5 smoothest seam to Grade 1 most puckered. That grading was designed for after washing, but the visual cues that drive a low grade are visible at purchase.
For related guidance on how the same scale explains other seams, see our guide on why pants seams pucker after the first wash. Both articles use the same smoothness scale, this one focuses on the hemline while the peer focuses on side seams.
You can spot three patterns without a magnifier. Tension pucker looks like tight thread pulling fabric inward along the stitch, with tiny gathers between penetration points. Feed pucker looks like a wavy stitch line that lifts the edge into soft ripples, even when thread tension feels even.
Shrinkage pucker may not show in store but appears after first wash when fabric and thread shrink at different rates. Balanced tension distributes load across the folds, so the edge stays flat. Excessive needle tension or uneven feeding creates ridging that will look more pronounced after laundering.
That is why the smoothness after home laundering method shows how washing relaxes and reveals imbalance. The Grade 5 smoothest seam to Grade 1 most puckered scale helps you name what you see now as a predictor for later. For blind hems, the bite that catches the face should be nearly invisible.
If you see large dimples on the outside, the bite is too deep or tension too high, and that spot will show more after wear. Examining the stitch penetration from the side reveals whether the dimple is shallow and even or deep and pulled, which signals whether tension is balanced across the fold.
Stage boxes showing process in 3 stages from start to finish
Chain stitch versus lockstitch at the hem: spotting unravel risk from the side seam
Puckering signals tension, but stitch type signals security, which matters once the hem is under daily stress. Two hems can look equally smooth in store yet behave differently after a snag.
The lockstitch 301 is formed by two threads interlocking in the middle of the fabric. That interlock makes a strong seam that does not unravel easily, which is why it is commonly used in garment manufacturing. A chain stitch is formed by looping thread back on itself to create a chain-like pattern.
It gives more stretch, but the loops rely on the next loop to hold. The difference shows in failure mode. A single-thread chain stitch 101 may unravel if one loop breaks, because the chain can run. Even a double-thread chain 401 keeps a chain structure, so it can still run if the looper thread is cut.
A lockstitch 301 may hold even if one stitch breaks because the top and bobbin threads are knotted inside the layers. That is why chain stitch hem unraveling risk is higher for hems finished quickly on a chain machine. Examining the side seam junction where hem meets seam reveals whether the thread tail is looped or knotted, which signals how secure the edge will stay.
Look at the side seam where the hem meets the seam. A chain finish often leaves a loopy tail or a small chain-off that sticks out, or a single thread line you can follow. A lockstitch finish shows a small knotted bartack or a short backstitch that locks the end. Before committing, check the side seam junction at the hem — look for a chain of loops or a thick knotted tail, then tug gently near the tail area to see if the stitch chain would pull.
Blind hem versus topstitched hem durability for everyday wear
Security differs from visibility, so the choice between blind and topstitched comes down to use case rather than one being universally better. Both can be well made, but they age differently.
A blind hem is nearly invisible and ideal for formalwear, as the blind hem nearly invisible ideal for formalwear note explains. It keeps drape clean because only tiny catches show. That clean look depends on small blind catches, so if one catch breaks, the hem can drop locally in that spot.
A topstitched hem with a double-fold shows a stitch line, but that line reinforces the edge and resists abrasion at the bottom. It is described as durable and common in casual wear. The double-fold adds a bit of weight and protects the raw edge from fraying and scuffing on shoes or pavement.
Straight formal trousers benefit from a blind hem with a deeper allowance, because the weight helps drape and the invisibility keeps the line clean. Jeans, casual skirts, and workwear benefit from topstitched durability where the visible stitch adds strength against scuffing. After a season of regular wear, the bottom edge of a blind hem may show tiny pulls where catches took stress, while a topstitched hem may show fading along the stitch line but stay flat. For blind hem vs topstitched hem durability, the decision rests on whether you value invisibility or edge reinforcement more for that garment.
Hem quality quick-scan card: how to tell if a hem is well made without looking inside
Combining depth, tension, and stitch security into one check makes a fitting room scan fast enough to use without flipping the garment. Use the five outside clues below to infer inside construction and what it means for longevity.
This table is a practical evaluation tool created for this guide based on hem depth, tension, and stitch security mechanisms described above, not a published industry standard. Use it as a thirty second quick-check.
| Outside clue | Inside construction inferred | Longevity implication |
|---|---|---|
| Faint horizontal ridge 1–2 in above hem | Deeper allowance, typically 1–2 in on pants, 2–3 in on skirts | Better hang, typically resists curling because added weight stabilizes edge |
| Nearly invisible tiny dimples, no stitch line | Blind hem EFb with balanced tension and shallow bite | Formal drape, but check catch strength — if one catch breaks, local drop possible |
| Visible straight topstitch near edge | EFa double-fold topstitched, edge turned twice and stitched through | Durable casual, reinforces edge and resists abrasion |
| Wavy rippled line along hem, Grade ≤3 | Tension or feed pucker, unbalanced or differential feeding | Likely worsens after wash per TM88B, may look more pronounced after laundering |
| Loopy chain tail at side seam vs knotted bartack | Chain stitch 101/401 chain-off vs lockstitch 301 bartack | Chain may unravel if one loop breaks, lockstitch typically secures even if one stitch breaks |
Scan in thirty seconds in this order: start at side seam for security, then look for ridge for depth, then follow the hemline for smoothness. The hem finish should not add bulk that shows through, so a ridge should be faint and even, not thick and lumpy. For daily wear pants, prioritize depth and a secure bartack over perfect invisibility, because a hem that curls or runs shortens wear more than a visible stitch.
The One That Matters
Well-made hems look smooth from the outside, show a faint weight ridge one to two inches up, and finish at the side seam with a knotted bartack rather than a loose chain tail. In the fitting room, pinch for depth and check that side seam tail in thirty seconds. That quick check helps you avoid hems that curl, ripple, or run after a few wears.
Frequently Asked Questions
Can you tell chain stitch versus lockstitch at the hem without flipping pants inside out?
Yes. At the side seam junction, chain shows a looped tail, lockstitch shows a knotted bartack. A lockstitch interlocks two threads, while chain loops easily come undone if broken, so lockstitch holds longer for daily pants.
Does a deeper hem always mean better quality for lightweight skirts?
No. Deeper hems add weight that steadies straight edges — straighter edges have deeper hems than flared, and skirts often use two to three inches. On very flared or sheer fabrics a wide hem can add bulk or show through, so a narrow rolled hem is often correct.
Is a visible topstitched hem less durable than an invisible blind hem?
No. A topstitched EFa double-fold shows a stitch line but reinforces the edge and resists abrasion, so it is durable and common in casual wear. A blind hem EFb stays nearly invisible for formal drape but relies on small catches. Pick topstitching for daily durability, blind for formal invisibility.
If my new pants hem already shows slight puckering in store, will washing make it worse?
Yes, it can. Smoothness after home laundering is the purpose of TM88B, and Grade 5 smoothest seam to Grade 1 most puckered shows how imbalance is graded. If the hem looks wavy at Grade 3 or lower, expect it to look more pronounced after washing, so choose a smoother edge.