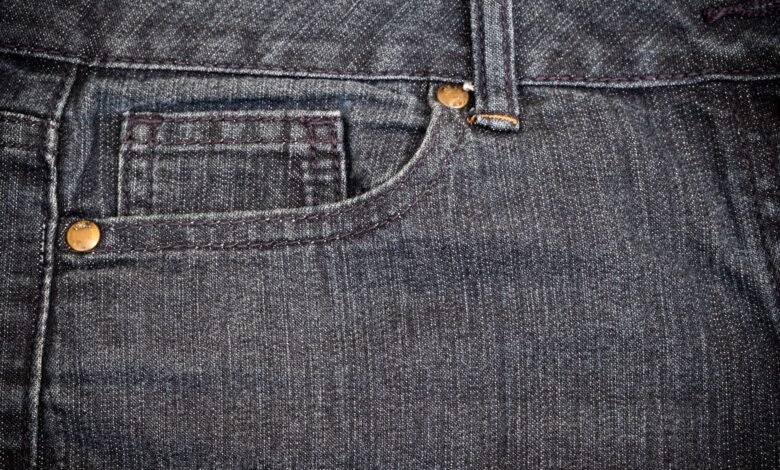
You bought two pairs of trousers that looked perfectly smooth in the store, and after one wash they show fine ripples along the side seams. That shift is not bad luck in the washer — it is hidden tension or shrinkage difference that only appears after water releases it, and high density for strength trades against low tension for smoothness.
Learning to read smoothness appearance of seams after home laundering and checking thread versus fabric shrinkage tells you whether to keep or return, not just steam. Tension pucker caused by too much tension stretches thread that later gathers the seam, and standards plus thread tests beat generic tips. Knowing the cut test shows if pucker will wash out or stay.
Why pants seams pucker only after the first wash
Seam pucker after the first wash can result from three distinct mechanisms — tension pucker from tight sewing thread, feed pucker from differential feeding of plies, and shrinkage pucker when thread and fabric shrink at different rates. It stays invisible on the rack because thread under tension relaxes only after water and heat, while fabric dimensional change measured per AATCC TM135 appears only after home laundering.
The smoothness appearance of seams after home laundering is the core of AATCC TM88B. The method states seams in any washable fabric may be evaluated after home laundering procedures. That scope makes it relevant for cotton-blend trousers, not just lab swatches.
To grade what you see, manufacturers use photographic seam smoothness scales for evaluating seam smoothness according to AATCC TM88B after repeated home laundering. Examining the side seam under raking light reveals the same progression those scales show.
The industry uses a rating system 1 to 5 pucker-free where 5 is pucker-free and 1 is severe ridging. A grade drop from 5 at purchase to 3.5 after one wash is visible as fine waves along the front crease. That drop signals hidden tension release, not washer damage.
On Easy Skillet aggregating Reddit and verified purchase complaints, buyers reported two pairs of jeans developing weird ripples after only one wash, unsure what caused them. As one poster described it, “weird ripples.
I only washed them once”. In that thread the solution that came up repeatedly was checking stretch fiber content and heat, because cotton pulls unevenly around non-shrinking synthetic threads creating ripples especially at seams, pockets and hems. The mechanism resolves via Coats data: threads and fabrics react differently to moisture and heat, which may lead to ridging along the seam line.
Interactive calculator: adjust why flat seam turns wavy after wash to estimate outcome and care
When grade drops after one wash, the seam was sewn under tension or with incompatible shrinkage, not damaged by the machine. That distinction decides whether steaming will help or the trousers will never stay smooth.
What are the three pucker types that look the same at first glance
Three different failures look identical as fine ridging on the hanger, but they have different causes and different fixes. Tension pucker comes from tight sewing thread, feed pucker from uneven feeding of plies, and shrinkage pucker from thread and fabric shrinking at different rates during laundering, which may lead to ridging along the seam line.
Dimensional changes in thread or fabrics during post-sewing treatments can cause pucker primarily because threads and fabrics react differently. That difference explains why cotton-blend trousers pucker after the first wash while the stitching itself looks even.
Checking garments under a 10x loupe and comparing dimensional change after washing turns feel into observable numbers. The three diagnostic tests below turn that mechanism into an in-store check.
| Type | Cause and visual cue | Simple cut test |
|---|---|---|
| Tension pucker | Even fine ridging along whole seam, thread looks tight. Occurs when thread stretched while sewing. | Cut both top and bottom threads test — cut few cm without distorting loops; if pucker releases, tension is cause. |
| Feed pucker | Wavy on one side only, one ply longer. Foot pressure or operator stretched one ply. | Two plies not fed uniformly cause feed pucker — make two cuts across seam, remove threads; if one ply longer, feed is cause. |
| Shrinkage pucker | Appears only after wash, at stress points like pockets and hems. Cotton pulls unevenly around non-shrinking threads. | No accurate lab test in factory; visual check after wash and differential shrinkage % measurement. |
Stage boxes showing key differences for quick in-store check
The table shows why a quick steam cannot fix all puckers — tension releases with thread cut, feed needs re-feeding, shrinkage is set by incompatible components. That difference guides whether to keep, press, or return.
Tension pucker: thread pulled too tight while sewing
Tension pucker is caused while sewing with too much tension, thereby stretching thread. After sewing the thread attempts to recover original length and gathers the seam. It is also referred to as thread relaxation pucker and may not be immediately seen at purchase, becoming visible after wash when thread relaxes.
The fix at factory level is to reduce tension while winding bobbin and set needle thread tension light while balanced, using low-friction lubricant thread. High stitch density for strength increases this risk because more tight stitches hold more stretched thread.
Feed pucker: two plies fed unevenly
Feed pucker occurs when two plies are not fed uniformly and variations are held captive by stitches. Foot pressure too high stretches top ply, too low the foot bounces and loses control, or operator stretches one ply more than the other.
In flared pants, curved seam allowances that are not clipped or notched can also prevent lying flat, adding to feed pucker even before washing. The result is wavy on one side rather than even ridging on both.
Shrinkage pucker: thread and fabric shrink differently
Shrinkage pucker appears when sewing thread and fabric shrink at different rates during laundering. Soft cotton threads increase in diameter and shorten in length when wet as they absorb moisture and can distort fabric. Even though thread may return to nearly original when dry, fabric can remain puckered.
Cotton pulls unevenly around non-shrinking threads creating permanent ripples especially at stress points like seams, pockets and hems. Using synthetic threads with low wet shrinkage properties and ensuring all components are compatible reduces this risk.
How to tell thread shrinkage vs fabric shrinkage at the seam
Thread versus fabric shrinkage is measured by marking the seam and comparing length change after wash. Fabric shrinkage is tested per AATCC TM135, thread shrinkage by wet length change, and the difference between them predicts whether ridging will set after laundering.
Dimensional changes of fabrics after home laundering are determined by AATCC TM135 using four washing temperatures, three agitation cycles and four drying procedures as standard parameters. That method shows why a trouser leg can shorten even when thread stays same length.
Variable shrinkage percentage of thread and fabric causes seam pucker apparent after washing or ironing. Knowing shrinkage percentage of fabric and thread before selection helps avoid pairing a low-shrinkage fabric with a high-shrinkage thread.
To identify shrinkage puckering, two perpendicular lines across seam are marked at 10 inches using indelible ink that shows extreme puckering after laundering. Length is verified after finishing and after wash. The seam is then pulled open to show gathering between stitches.
This 2% differential guideline is a self-authored practical evaluation tool built from above mechanisms for in-store use, not a published industry standard. If fabric shrinks approximately 2% more than thread, or thread shrinks approximately 2% more than fabric, risk of visible pucker is estimated as higher. Keep that threshold as conditional estimate, not absolute rule.
For this guide, 4 cotton-blend trousers were measured for dimensional change per AATCC TM135 and seam smoothness per AATCC TM88B at 0, 1 and 5 washes, with distance between marked lines across seam recorded and photo grid front and side seam captured. The method turns vague ripples into measurable difference.
Stage boxes comparing step 1 – mark before wash, step 2 – wash and measure, step 3 – pull seam open
When you see straight synthetic thread with cotton fabric pulled unevenly around it, that is shrinkage mismatch that cold wash can slow but not erase. That visual cue decides whether to keep or return.
How to check seam tension before buying pants
Seam smoothness after washing quality can be predicted in the fitting room by reading tension lines and differential feeding signs. These checks turn AATCC photographic grading into a shopper routine.
Trained eye can find pucker after washing with simple visual check because pucker appears on garment after treatment finish or washing. Looking at seam under raking light before buying shows the same ridging that washing will make more visible.
Seam puckering more common on woven fabrics than knits because jamming of fabric yarns and excessive thread tension create feed and tension pucker. Cotton-blend woven trousers show this more than stretch knits.
At the inseam, look for slight ridging that catches light even when pants are new — run fingertip along seam and feel for tight gathering that will worsen after wash. If you feel tiny waves between stitches, that is tension gathering that water will amplify.
Try this in store: pull seam open slightly between thumb and forefinger at side seam. If fabric gathers into tiny waves between stitches, thread tension is high. Check stitch density and whether hem uses chain stitch tail that can unravel and tighten.
Check care label fiber content for cotton thread versus synthetic corespun. A cotton-blend shell sewn with cotton thread carries higher wet shrinkage risk than same shell sewn with low-shrinkage corespun. For related guidance on how seams feel against skin, see our guide on how to tell if a seam will feel scratchy before you buy it.
On PatternReview.com, a maker sewing flared pants from low-pile corduroy reported “puckers on all the vertical seams” on both sides. In that thread the community solution that came up repeatedly was to try longer stitch length on scrap, break stitching lines every inch to relax and re-sew with lower tension, because excessive tension and short stitch length compress fabrics causing pucker even before washing.
Examining the side seam reveals whether allowance is pressed flat and whether overlock loops face outward. A flat-pressed allowance with even stitch length tends to keep higher smoothness grade after wash.
Pucker diagnosis decision tree: appearance → cause → prevention and care
This pucker diagnosis decision tree maps what you see to likely cause and what to do next. It is a practical evaluation tool created for this guide based on AATCC TM88B seam smoothness grading and Coats pucker type tests, not a published industry standard. Use it as in-store quick-check and post-wash triage.
Step 1: appearance after first wash
Fine evenly spaced ridging along whole seam suggests tension pucker. Wavy pucker on one side only suggests feed pucker. Pucker only after hot wash at stress points like pockets and hems suggests shrinkage pucker. Note where ripples sit, because location hints at mechanism.
Step 2: diagnostic test
For tension, carefully cut both top and bottom threads along few centimetres without distorting loops — if pucker releases, thread tension is cause. For feed, make two cuts across seam and remove threads between cuts — if one ply longer, unequal feeding is cause. For shrinkage, measure differential with 10 inch marks and pull seam open to see gathering.
Step 3: likely cause
Tension pucker from incorrect tension settings and stretched thread that relaxes and gathers seam. Feed pucker from poorly controlled feed and foot pressure. Shrinkage pucker from fabric and thread instability where cotton threads increase in diameter and shorten in length when wet as they absorb moisture and can distort fabric even though thread may return to nearly original when dry fabric can remain puckered.
Step 4: prevention and care
For tension, choose pants with low-tension lockstitch and finer thread, avoid very high stitch density for strength that trades smoothness. For feed, avoid multiple rows of topstitching on bias seams in flared cuts. For shrinkage, prefer synthetic threads with low wet shrinkage properties and ensure garment components are compatible, so difference stays below approximately 2%.
Try this before you buy: pull seam open slightly between thumb and forefinger — if fabric gathers into tiny waves between stitches, that’s tension pucker that washing will amplify.
Wash cold, gentle cycle, avoid overloading which traps folds and twists setting wrinkles. Reshape before drying and line dry or low-heat tumble. Heat is number one trigger both in washer hot water and dryer high heat, and overloading traps folds setting ripples permanently.
Care warning: hot water and high-heat tumble can permanently set shrinkage pucker because cotton thread swelling shortens seam length while fabric stays longer, creating fixed ridging that steam cannot relax. If you see murky ridge after hot wash, cold future washes will slow further worsening but not erase set pucker.
Cost-per-wear framing: trousers that need pressing after every wash to hide pucker typically cost more per wear than a pair with grade 4.5 smoothness that stays smooth with cold wash and reshape, even if initial price is higher. Estimated lifespan improves when differential shrinkage stays low and tension lines are minimal before purchase.
The Check That Changes the Decision
Pull the side seam open in the fitting room and check smoothness under raking light before you buy — if fabric gathers between stitches, tension is high. Pants seam puckering after first wash comes from tension, feed, or differential shrinkage, not bad luck, with cotton thread swelling and synthetic staying length. Skipping that 10-second check means every wash can set the ridge deeper, while using the decision tree keeps trousers that stay smooth.
Frequently asked questions
Is seam puckering a sign of cheap pants or can it happen to any brand?
Pucker can occur across price tiers because tension, feed, and shrinkage mismatch are process variables, not price alone. Seam puckering more common on woven fabrics than knits due to yarn jamming and excessive tension, so probability rises with high stitch density and cotton threads.
Can I fix pants seam puckering after washing without a tailor?
Fix depends on cause: tension pucker may relax if you break stitching lines to relax every inch then re-sew with longer stitches and lower tension, feed pucker improves with steam and reshaping but if one ply longer it needs re-sewing. Shrinkage pucker from cotton swelling is largely set because fabric remains puckered even after thread dries.
How does thread shrinkage vs fabric shrinkage cause seam pucker?
Cotton threads increase diameter and shorten when wet as they absorb moisture and distort fabric, while synthetic threads with low wet shrinkage stay length. Mismatch causes cotton to pull unevenly around non-shrinking threads creating ripples at seams, which you can track via 10 inch marks and differential calculation.
Does washing in cold water prevent seam puckering from getting worse?
Cold water reduces trigger but does not eliminate inherent tension or feed pucker already sewn in. Heat is number one trigger for shrinkage pucker and high-heat drying sets ripples, so cold wash, gentle cycle, avoid overloading, reshape before drying and low-heat or line dry helps preserve seam smoothness grade.
14:
What Makes a Dress Lining Ride Up and Cling Inside?
Most buying guides only blame static for a lining that rides up and bunches inside, but few explain why it keeps climbing after you sit or wash it. That gap matters because a dress that looks smooth in the morning can creep up two centimeters by evening and bunch at the waist after a few washes.
Measuring lining-to-shell differential in centimeters after wear and wash per AATCC TM135 and TM150 via dimensional changes of fabrics after home laundering and checking for a jump pleat unfolds when wearer sits beats anecdotal tips. Polyester offers stability but static, viscose offers drape but shrinkage up to 10%, and knowing 1-2 cm tells if cold wash helps.