A shirt button that falls off after one wash usually failed at the thread, not the fabric — too few stitches, no wrapped shank, and a flat tight sew concentrate all the pulling force on two thin threads that grind against the buttonhole every time you fasten it. You can catch that weakness before you buy by counting thread legs, checking for shank lift, and feeling the placket for reinforcement, all in under a minute.
A flat, few-stitch attachment saves the factory time but concentrates load on the thread and lets the button rub it raw, while a wrapped thread shank spreads that same load and protects the thread from abrasion. Spotting the difference between the two, plus a bar tack at the base of the placket, tells you which shirts will keep their buttons past the first few washes.
Why shirt buttons fall off weeks after you buy them
Buttons fall off weeks after purchase because the sewn junction fails without fabric damage, the same threshold that ASTM D1683 measures by pulling perpendicular to seams. Low stitch count, unbalanced tension, and no shank concentrate load at the hole edge, so thread abrades and breaks while the shirt fabric stays intact.
Seam engineering variables explain why that happens. Fabric type, seam type, stitch type, stitch density, thread tension, and thread strength must match the button and placket. Improper selection can result in failure of the sewn junction, because strength depends on stitch density, thread tension, and thread strength.
For a button, a flat tight sew with four legs puts all pull on two thin thread bridges. Each buttoning drags buttonhole fabric across those bridges and grinds the thread at the hole edge. A formed thread shank can distribute load and reduce fabric strain at the attachment point, while higher stitch count and reinforced placket interfacing may increase resistance to pull-through compared to few flat stitches.
That difference shows up after the first wash, not in the fitting room. Thread swells, then shrinks, tension loosens, and a short flat attachment loses grip. This focus is women’s woven work shirts from budget to investment tiers, where button loss after one or two washes signals weak attachment, not careless wear.
Stage boxes showing process in 2 stages from start to finish
This diagram shows the core trade-off. Flat few stitches save time but concentrate force, while a wrapped column spreads force and shields thread.
What a secure button attachment actually looks like under a loupe
Secure attachment shows 12 to 16 visible thread legs on a 2-hole button, which equals 6 to 8 passes, and 16 to 24 legs on a 4-hole button, with even X or parallel formation. Holes stay clean, no cracked rim, no loose loops that spin.
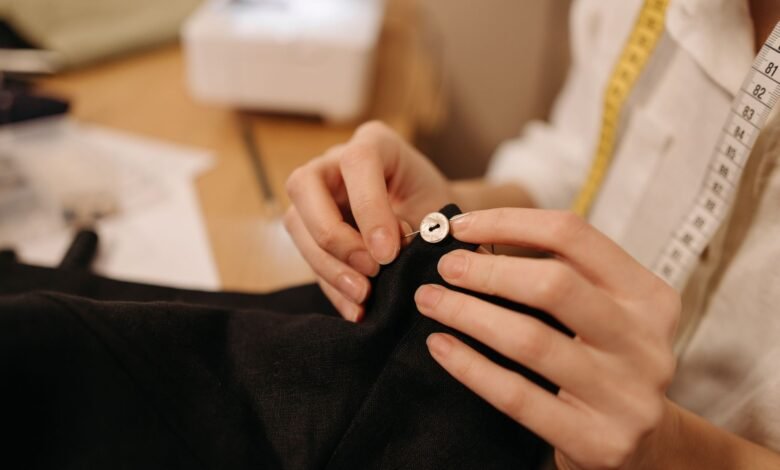
Underneath you should see thread tails knotted with a surgeon’s knot buried under the shank wrap, not trimmed flush at the fabric. A tight wrap 6 to 10 times forms a column, and many better shirts add a small clear stay button on the inside to protect fibers and spread load.
Cheap attachment shows 2 strands of cotton, 4 legs visible, raw tail cut flush, and a button that wobbles because the wrap is missing. That wrap matters because it prevents button from rubbing threads, which otherwise wears thread and causes the button to fall off.
On Mumsnet, a shopper reported new shirts where buttons fell or broke on the first wash and the brand said buttons are not considered part of the garment. As one poster described it, “Buttons sewn on with two strands of cotton”. In that thread the solution that came up repeatedly was resewing with button thread and forming a thread shank, because seam engineering variables show strength depends on stitch density, thread tension, and thread strength, and low density with improper thread concentrates failure at the attachment point.
At the placket inside, look for a buried knot and backing. Does the tail disappear under the wrap or is it cut flush? Is there a small clear stay button protecting the fabric?
Stage boxes showing process in 3 stages from start to finish
Shank vs flat buttons: which holds better on women’s shirts?
Flat buttons have two or four holes and sit directly on fabric. Shank buttons have a mushroom stem underneath, and a thread shank is a stem you form by wrapping thread around the stitch legs.
A flat button sewn tight with no space pinches the placket and puckers when buttonhole fabric pulls. Each closure grinds buttonhole edge against raw stitch legs, which speeds abrasion.
A thread shank creates a post about the same height as the buttonhole fabric thickness. That post lets overlapping fabric move freely. A shank shank allows thickness for buttonhole fabric and lets overlapping fabric move freely, without space the buttonhole fabric may pucker and buttoning becomes a struggle.
Buttons come in two basic types flat and shank, depth of shank variable, and wrap flat and shank button types prevents rubbing which wears thread. Too tall a shank wobbles and snags, too short pinches and still abrades, so for women’s shirts a low-profile thread shank typically holds better than a flat tight sew.
Stage boxes showing process in 3 stages from start to finish
For women’s work shirts, low thread shank usually balances movement and security best, because it lifts the button just enough to protect thread without wobbling.
How to check stitch density, knotting, and wrap height in the store
That same load distribution principle gives you a quick fitting-room protocol you can run with a phone loupe. No tools beyond your phone are needed.
First count thread legs per button on the topside. Less than 8 legs is high risk for quick failure. Approximately 12 legs or more for 2-hole and 16 or more for 4-hole is typically more secure, because higher density spreads pull.
Next measure wrap height. Pinch the button and lift gently.
Use a phone ruler or small caliper if you have one. Approximately 2 to 3 mm of wrapped column for shirting indicates a formed shank. This 2 to 3 mm figure is practitioner guidance, not an ASTM threshold, so treat it as an estimated guideline.
Then do a wobble test. Pull lightly sideways. The button should not spin freely or feel gritty. Grit suggests raw thread grinding with no wrap to protect it.
Finally flip the placket. Look for a buried knot, not clipped tails, and a slight sheen that suggests polyester button thread rather than thin cotton. A small clear stay button on the inside is a strong quality signal.
On MoneySavingExpert Forum, a shopper reported a new coat that lost 4 buttons on the first day, with spare buttons also falling, and staff said it was normal. As described, “4 buttons missing first day”. The fix that tailors recommend is adding backing buttons and lockstitch machine attachment with proper shank, because blanket stitches secure shank and prevent rubbing that abrades unsecured legs quickly under buttonhole friction.
Try this before you buy: pinch button and lift — is there a small column of wrapped thread underneath? Count the thread legs on top — can you see more than 8?
How placket interfacing and bar tacks keep buttons from pulling through
Even a well-wrapped shank fails if the placket itself has no support. The placket needs structure to hold thread without tearing.
A quality shirt placket uses two fabric layers plus an interfacing strip on one side, half the width of the placket pieces, that gives structure where buttons and buttonholes go. The strip adds crispness and stops stitch holes from elongating. Without it the fabric is floppy single layer and thread pulls through.
Bar tacks add reinforcement at high-stress points. A bar tack reinforcement at buttonholes is a set of wide stitches performed several times directly on top of one another for reinforcement and stability. Bar tacks are often used as the top and bottom of buttonholes, the end of a fly, or at pocket corners.
Pinch the placket edge to check. You should feel 3 layers and slight crispness, not a thin single layer. Look at the base of the front placket for a dense zigzag bar approximately 6 to 10 mm long. That bar stops the placket from splitting when the bottom button pulls.
For related guidance on inferring inside construction from outside cues, see our guide on how to tell if a seam will feel scratchy before you buy, which also teaches pinch and seam finishing checks that apply to plackets.
Before committing, pinch the button placket edge between thumb and forefinger — can you feel a crisp extra layer inside? Look at the bottom of the placket for a dense zigzag bar that indicates reinforcement.
Button security scoring rubric: the 5-point check before you buy
This rubric is a self-authored practical evaluation tool built from above mechanisms for in-store use, not a published industry standard. Use it as a quick check with your phone loupe before buying.
Score 1 for each criterion that shows secure construction, 0 for weak. All thresholds are practical guidelines, not industry standards, and wrap height is practitioner guidance, not an ASTM threshold.
| Criteria | 0 = weak | 1 = secure |
|---|---|---|
| Stitch count | Fewer than 8 legs visible | 12 or more legs for 2-hole, 16 or more for 4-hole |
| Shank and wrap height | Flat tight, no column | Formed wrap approximately 2 to 3 mm, 6 to 10 wraps |
| Tail knotting and stay button | Clipped flush, no backing | Buried surgeon’s knot or clear stay button inside |
| Placket interfacing layers | Floppy single layer | Crisp 2 to 3 layers with interfacing strip half width |
| Bar tack at placket base | None or single stitch | Dense zigzag approximately 6 to 10 mm long |
Interpretation: 4 to 5 points is typically secure for regular wear. 2 to 3 points is moderate risk and may need reinforcement after purchase. 0 to 1 point typically fails quickly, especially after washing.
To use it, score one shirt in the fitting room and log the total in your notes app. Compare across price tiers. If a shirt scores low but you love the fabric, budget for a tailor to resew buttons with button thread, form a thread shank with 6 to 10 wraps, add a stay button, and add a bar tack stability at buttonholes at the base if missing. That reinforcement is usually low cost and worth it only if the shirt otherwise fits well.
Before you buy
Button loss usually comes from low stitch count, no wrapped shank, and no placket support, not from how you wash. Count legs, lift for shank, flip for knot and bar tack before you pay. Skip shirts that score 0 to 1, or plan to have a tailor add a proper shank and backing, so you keep buttons instead of hunting for them.
Frequently asked questions
Is a shirt with no thread shank always going to lose buttons?
No, but risk is higher. Flat tight sewing can survive if stitch count is high, thread is polyester, and placket is interfaced. Without extra space buttonhole fabric may pucker and thread grinds faster, so check other rubric points for safety.
Can a tailor add a proper shank to a shirt I already own?
Yes. A tailor can resew with button thread, form a thread shank with 6 to 10 wraps, tie a surgeon’s knot, and add a stay button. It is typically low cost and worth it if the shirt scores 2 to 3 and you otherwise love the fit.
Does this guidance change for delicate fabrics like silk or sheer blouses?
Yes, conditionally. Delicate fabrics may use smaller buttons and fewer wraps to avoid distortion, but still need a backing button to prevent tear and lightweight interfacing. For sheer blouses a flat sew with stay button may be intentional to reduce show-through, so handle with extra care.