Blazer lapels bubble after dry cleaning when the bond between the face fabric and the interlining underneath was already weak, not simply because the cleaner used too much heat. That bubbling is puckering from delamination — the layers separating from poor bonding — and cleaning heat is often just what reveals a problem that started at the factory. Where the bubbles sit and how the lapel feels when you flex it tells you which side is really at fault.
A fused lapel keeps manufacturing costs down by bonding the layers with adhesive, but that same adhesive can soften during cleaning while the shell and interlining shrink at different rates, so heat becomes the trigger rather than the cause. A 60-second pinch, roll, and light test can tell you whether a blazer has floating canvas or a bonded sheet underneath before you ever take it to the cleaner.
Why do blazer lapels bubble after dry cleaning instead of just wrinkling
A fused lapel is made by bonding face fabric to fusible interlining with small thermoplastic adhesive dots melted under heat and pressure. That bond is meant to stay dotted and flexible, not a solid sheet.
During dry cleaning the adhesive can soften while the shell and interlining move differently. Differential shrinkage or uneven heat and pressure can pull the layers apart, so the surface puckers instead of forming a flat wrinkle.
Bubbling occurs when face fabric or interlining becomes puckered from delamination, poor bonding, differential shrinkage, uneven temperatures or pressure, or inconsistent resin use. That definition explains why the defect looks like raised blisters, not a simple crease that presses out.
Loss of bond happens when resin migrates toward heat and becomes embedded in the interlining substrate instead of the shell fabric, which prevents an effective bond. The lapel is sensitive because it needs a natural roll with gentle curve and internal tension, so improper heat or moisture compromises the layers and lifts the face into bubbles.
This focus here is women’s blazers in the mid-range to investment tier where fused and half-canvas coexist, not fully unstructured knit blazers. In that tier the blazer lapel bubbling after dry cleaning cause is usually a fusing weakness revealed by cleaning, not just cleaner error.
Stage boxes showing process in 4 stages from start to finish
What delamination, boardiness, and differential shrinkage look like on a real lapel
That same gap above defines three visible signals you can read without opening the blazer. Each points to a different failure mode.
Bubbling zone shows as raised irregular blisters along lapel roll and chest, often in a cluster that ends abruptly where the fused panel ends. Delamination edge is the line where bonded area stops and air pocket begins, felt as hollow when you lightly press and release.
Boardiness is another problem when resins liquefy and run together to form a resin coating instead of being retained in dotted manner, a result of over fusing, too much adhesive, and excessive heat or pressure. A boardy lapel feels stiff like paper and does not spring back, while a canvas lapel shows soft drape that moves with you.
Differential shrinkage is a separate contributor. If shell and interlining shrink differently, the surface folds in stabilized parts when dimensional stability difference is too big. That creates puckering that follows the seam, not random bubbles, and may also show as tightening at the chest.
To separate these from a pressing mark or pocket imprint, check location and hand feel. Pocket imprint is rectangular and low, pressing shine is flat, while fused interlining delamination signs show as irregular bubbles at roll line with hollow edge and stiff hand.
At the lapel roll, look for stiff board-like hand versus soft drape that springs back. If the roll feels boardy and cracks slightly when flexed, resin has formed a coating and future delamination risk is higher.
Is it the dry cleaner or the factory fusing that failed
Boardiness versus soft drape signals above feed into a decision about fault. Both factory and cleaner can contribute, but mechanism differs.
Delamination may result from under fusing, over fusing, not enough cooling time, or incompatibility of resin and shell fabric, plus shrinkage may cause performance problems if one part shrinks from fusible interlining and adjoining pieces do not. Those are factory variables present before any cleaning.
Dry cleaning acts as catalyst. Heat, moisture, solvent, and pressing can soften adhesive while shell and interlining move differently. High fusing temperature can cause fabric shrinkage that makes seaming inaccurate, creating puckered surfaces, and during maintenance relaxation shrinkage and hygral extension differences can cause surface folding if dimensional stability difference is too big.
Bubbles that end abruptly at panel edge and appear after first cleaning often point to manufacturing defect, while bubbles after many cleanings plus hardening and tightening point to cumulative heat damage. The dimensional changes of garments method from AATCC TM150 provides the standard way to measure that garment-level shrinkage and compare shell versus interlining change.
On StyleForum, a buyer described a Brooks Brothers 1818 half-canvassed suit returned from the dry cleaner with wrinkled lapels and bubbling after first cleaning. As one poster described it, “bubbling above the left jacket pocket”. In that thread the solution that came up repeatedly was that the tailor and sales advisor concluded the cleaner used too much heat when pressing, suggesting pressing technique matters but the abrupt edge and location point to fusing weakness, because heat and pressure can cause adhesive to migrate and bond to fail per the PMC Review of Fusible Interlinings Usage mechanism where resin moves toward heat.
If bubbles are isolated to lapel and chest panel edge, take it to a tailor for assessment rather than back to the cleaner for re-pressing with high heat. Re-pressing a delaminated area can set boardiness further and make repair harder.
Stage boxes showing process in 3 stages from start to finish
How to tell if a blazer is fused or canvas without opening it
Fusing failure points to construction type, and you can check type without cutting. This is where how to tell fused vs canvas blazer lapel becomes a practical in-store skill.
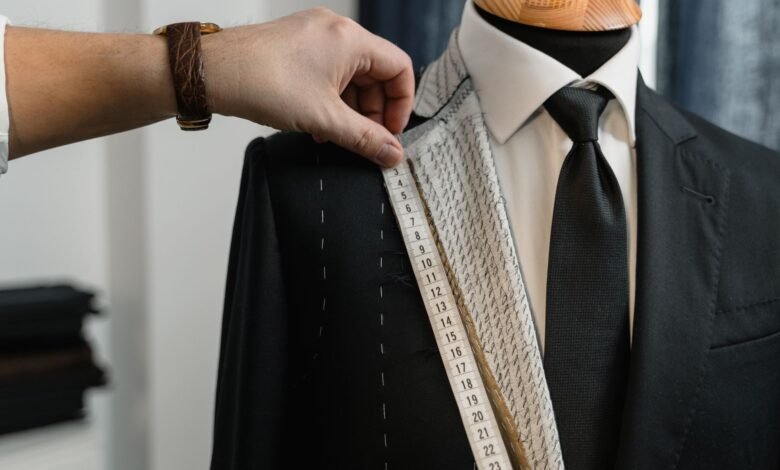
Pinch test is the first check — grab fabric between buttonholes and pinch to feel a layer between inner lining and outer fabric. If you feel a distinct third floating layer that moves independently, it may be full canvas. If you feel a stiff uniform sheet or nothing separate, it may be fused. A half-canvas has floating layer at chest and lapel but fused lower down, so test both chest and below buttons.
Second check is lapel underside. Look inside lapel for tiny pad stitches holding fabric in a hand-stitched pattern. Fused lapels show no pad stitches, only smooth bonded surface. Canvas lapels show small pick stitches that allow roll to be shaped with thousands of stitches.
Third check is flex and light. Hold lapel tip to light at the gorge, the notch where collar meets lapel. Canvas shows stitch texture and slight irregularity, fused shows uniform dotted pattern and may show tiny raised irregular areas that catch light as early bubbles. A faint crackle sound when flexing also points to fused adhesive.
Fused separates over time because adhesive is a continuous bond that can soften and migrate, while floating canvas moves independently and recovers. That independence explains why canvas drapes fluidly and fused can turn boardy and bubble after cleaning, which dry cleaning can act as catalyst for. For related guidance on chest stability, see our guide on why your knit dress sags at the shoulders after a day, which teaches shoulder stay tape and canvas detection that also apply to blazers.
Try this before you buy: pinch the chest between buttons, gently pull layers apart to feel for floating canvas versus stiff bonded sheet. If layers slide freely with a soft third piece in between, that is canvas; if they feel glued as one thick sheet, that is fused with higher bubbling risk.
How roll line shape and drape reveal lapel quality before bubbling starts
Floating canvas detection leads to roll quality, which you can see at the mirror before any bubbles form.
A natural roll should be lightly padded inside with constructed canvas and thousands of stitches to give volume and prevent flattening, unlike cheaper lapels pressed to a sharp flat crease. That roll creates fluidity that takes the wearer’s shape over time.
Fused lapels are often pressed flat to create a crease. They buckle or gap at the chest when buttoned, and feel boardy rather than soft. The visual cue for lapel roll line quality check is a soft curve from collar to first button, not a hard break or straight line pressed with an iron.
When buttoned, a quality lapel lies flat against chest without buckling, and when you walk it moves fluidly. A fused lapel stands away, shows a ridge, and may show slight puckering near gorge even before cleaning. Poor fusing boardiness distorts shape and predicts future delamination under heat because resin coating restricts movement while canvas hand-stitched allows movement.
On MoneySavingExpert Forum, a buyer described a wool and silk blend suit returned with wrinkles and bubbling after cleaning at a chain cleaner and felt tighter. As described, “wrinkles and bubbling to the material”. In that thread members advised checking construction type and requesting a re-press versus accepting a manufacturing defect, noting differential shrinkage can cause tightening, which aligns with PMC mechanism where difference in dimensional stability between shell and interlining causes surface folding.
Before committing, check the lapel roll by buttoning blazer and stepping back. Does roll curve softly and lie flat, or break sharply and stand away from chest with a stiff hand? Soft curve plus drape that springs back signals canvas and lower bubbling risk.
Stage boxes showing process in 2 stages from start to finish
Lapel construction field test (3-step in-store pinch, roll, and light test)
This is the practical deliverable that turns the signals above into a 60-second fitting room check. It uses no tools and works for mid-range to investment women’s blazers where fused and half-canvas coexist.
This rubric is a self-authored practical evaluation tool built from fusing mechanisms and roll line principles described above, not a published industry standard. Use it as a quick in-store check before purchase.
Step 1: Pinch for floating layer
Location is chest between buttons and at lapel gorge. Gently pinch front fabric and lining and try to separate layers.
Feel for a distinct third floating layer that slides independently. Floating means canvas at that area, stiff uniform sheet means fused. Half-canvas feels floating at chest and lapel but fused below waist.
Step 2: Roll for natural curve versus flat press
Unbutton blazer and let lapel fall naturally, then button and check. A quality roll curves softly from collar to first button and lies flat against chest without buckling. A fused roll shows hard break, stands away, and feels boardy when flexed. Boardiness signals resin coating failure and higher bubbling risk after cleaning.
Step 3: Light for pad stitches and early bubbles
Hold lapel tip to light at gorge and along roll. Look for tiny pad stitches in a hand-stitched pattern versus uniform dot adhesive.
Scan for early irregular raised areas that catch light as pre-bubbling. If you see uniform dots plus slight blisters, risk is higher. Half-canvassed jackets still have front fused interlining from top to bottom, though lighter, so some risk remains even with canvas at chest.
| Signal | What to feel or see | Action |
|---|---|---|
| Pinch | Floating third layer vs stiff bonded sheet | Prefer floating at lapel and chest for lower bubbling risk |
| Roll | Soft curve that springs back vs sharp flat crease that buckles | If buckles and boardy, expect future delamination under heat |
| Light | Pad stitches vs uniform dots, tiny blisters that catch light | If dots plus blisters, choose half or full canvas or ask for low-heat press only |
If two of three signals show fused plus boardiness, the blazer carries higher bubbling risk after dry cleaning. For longevity, prefer half or full canvas where budget allows, and ask cleaner to avoid steam dummy on lapel and use low heat. If blazer already bubbled, do not re-press with high heat at home, take to tailor for inside assessment, as re-fusing rarely restores original bond.
The practical verdict
Bubbling is puckering from delamination where adhesive dots separate and resin migrates, not just a wrinkle that presses out. Run the 60-second pinch, roll, and light test before you buy and ask for low-heat pressing. If you skip it, even a mid-range blazer with weak bonding can bubble after the first clean and need costly rework to fix.
Frequently asked questions
Can a tailor fix a bubbled lapel after dry cleaning?
Once delamination creates air pockets, re-fusing rarely restores original bond because resin has migrated and embedded in interlining substrate. A tailor can sometimes open and re-press from inside or replace interlining but cost is high, and steaming lightly from back may help impression but not true bubbling.
How do I know if my blazer will bubble before I take it to the dry cleaner?
Use the three signals — bubbling zone ending at panel edge, boardiness versus soft drape, and roll line pressed flat versus natural roll. Try the pinch test for floating canvas, and note that half-canvassed jackets still have front fused interlining so some risk remains.
Does dry cleaning always cause bubbling on fused blazers?
No. Bubbling requires poor bonding, differential shrinkage, uneven temperature or pressure, or inconsistent resin, plus boardiness from over fusing. Well-fused jackets can survive many cleanings, but limiting frequency and requesting low-heat press lowers risk.